
How to Set Up 6011 for Penetrating, All-Position Stick Welds
Starting ranges by diameter: 40–90 A for 3/32, 75–125 A for 1/8 and 110–165 A for 5/32, with AC/DCEP and product-specific DCEN guidance.
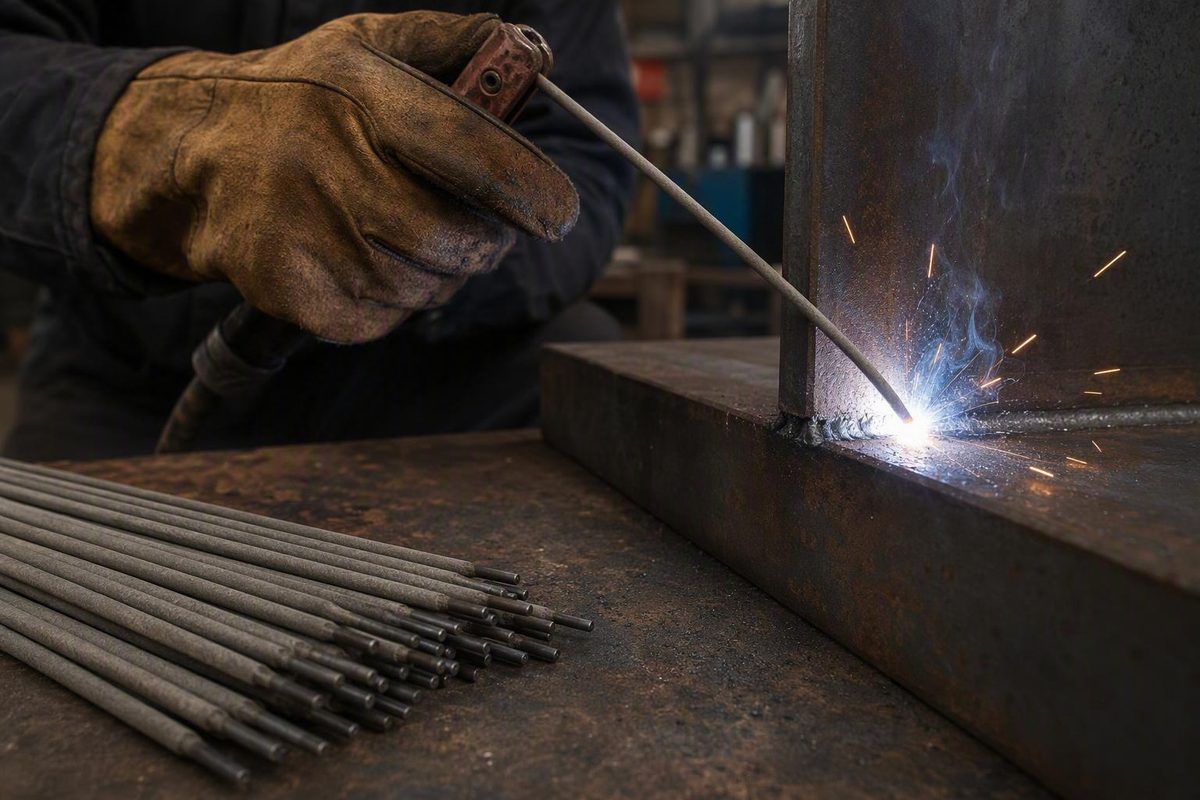
E6011 at a Glance: Capabilities, Limits, and Starting Settings
E6011 is a flux-coated consumable electrode for shielded metal arc welding (SMAW), commonly called stick welding. Commercial product literature describes it as a high-cellulose-potassium electrode for carbon or mild steel, with a forceful, penetrating arc and a fast-freezing puddle. Those descriptions help explain its popularity for maintenance, fabrication, and field repairs, especially where fit-up or surface condition is imperfect. They are commercial guidance, however, rather than independent performance testing.
The table below is an initial reference, not a welding procedure or a universal settings chart.
| Item | Practical reference |
|---|---|
| Process | Shielded metal arc welding (SMAW/stick) |
| Commonly identified base metal | Carbon or mild steel |
| Classification strength | 60,000 psi minimum deposited-metal tensile-strength class |
| Positions | Flat, horizontal, vertical, and overhead |
| Broadly supported current | AC and DCEP |
| Product-specific current | Some E6011 products also permit DCEN |
| Common diameters covered here | 3/32, 1/8, and 5/32 inch |
| 3/32-inch starting range | Approximately 40–90 A |
| 1/8-inch starting range | Approximately 75–125 A |
| 5/32-inch starting range | Approximately 110–165 A |
The classification, all-position designation, AC/DCEP compatibility, and diameter-specific ranges in this summary are supported by commercial electrode guides and product specifications. One product listing gives starting ranges of 40–90 A for 3/32 inch, 75–125 A for 1/8 inch, and 110–165 A for 5/32 inch and identifies the electrode as high-cellulose-potassium, all-position, and suitable for AC or DCEP (HYW E6011 product specifications).
Every amperage value in this article is a starting range. The range printed on the selected electrode package or current manufacturer datasheet takes priority. Position, polarity, joint geometry, steel thickness, machine output, electrode condition, and technique can all shift the useful setting within the approved range.
Before striking an arc, use this order of authority:
- Applicable code, project specification, or qualified welding procedure
- Current documentation for the exact electrode
- Welding-machine instructions
- Employer and site requirements
- Generic guidance such as this article
That boundary matters most when failure could injure someone. On structural, pressure-containing, lifting, vehicle, or other safety-critical work, identify and follow the governing documents rather than treating a familiar electrode classification or visually acceptable bead as proof of suitability.
What the E6011 Classification Means
The E6011 designation communicates several important characteristics, but it does not define a complete welding procedure.
- E identifies a welding electrode.
- 60 denotes a 60,000 psi minimum deposited-metal tensile-strength class.
- The third character, 1, identifies all-position capability.
- The final 1 is associated in the cited commercial guidance with a high-cellulose-potassium coating and an AC/DC current classification.
A commercial classification guide decodes E6011 in this manner and lists flat, horizontal, vertical, and overhead welding. It also identifies E6011 as a flux-coated SMAW electrode used on carbon or mild steel. This is useful secondary guidance, not the text of the current AWS A5.1 standard (WeldingMart stick-electrode classification guide).
The 60,000 psi value applies to the deposited-metal classification under the applicable specification and test conditions. It does not mean every completed joint will carry that stress or provide a predictable load capacity.
For unit context, 60,000 psi is approximately 414 MPa. The cited HYW listing presents 414 MPa in one table but an inconsistent 430 MPa elsewhere, so 430 MPa should not be repeated as the conversion of 60,000 psi.
The all-position designation covers:
- Flat welding
- Horizontal welding
- Vertical welding
- Overhead welding
It does not mean the same diameter, current, travel speed, or manipulation will work equally well in every position. Vertical and overhead work generally call for tighter puddle control and a lower initial setting within the selected product’s approved range.
The final 1 is commonly associated with a high-cellulose-potassium coating and AC/DC operation. Exact polarity still must be checked for the specific product. A broad “AC/DC” entry in a classification guide does not establish that every manufacturer approves both DCEP and DCEN for every diameter.
E6011 is a cellulosic electrode. It must not be described or treated as a low-hydrogen electrode.
Two conversion errors found in commercial listings are worth correcting:
- 1/8 inch is approximately 3.2 mm, not 0.125 mm.
- 60,000 psi is approximately 414 MPa, not 430 MPa.
These are conversion corrections, not alternative E6011 specifications.
Where E6011 Fits—and Where Generic Advice Stops
Commercial sources commonly list E6011 for maintenance, farm equipment, gates, trailers, pipe, structural fabrication, construction, shipbuilding, and outdoor or field repair. These lists show how suppliers position the electrode; they do not prove that a particular product is approved for every component, material, service condition, or industry named.
The recurring practical attraction is the combination of a penetrating arc and a fast-freezing puddle. Weldmonger associates E6011 with all-position work, repairs, farm equipment, gates, trailers, and imperfect steel surfaces, while recommending that amperage be adjusted through test welds rather than treated as fixed (Weldmonger E6011 guide).
That operating behavior can be useful when a welder needs to:
- Establish fusion at a root
- Manage imperfect fit-up
- Control the puddle outside the flat position
- Use an electrode compatible with an AC machine
- Repair weathered mild-steel equipment after appropriate preparation
Imperfect surfaces are not preparation-free surfaces
E6011 is commonly selected for carbon or mild steel carrying rust, mill scale, residual paint, or other surface contamination. That tolerance is relative. It does not identify an unknown coating, make fumes harmless, prevent fire, or guarantee acceptable weld metal.
Remove loose rust, scale, paint, oil, grease, moisture, and dirt where practical. Clean enough around the joint to inspect the steel, maintain the arc, and avoid introducing unnecessary contamination. Prepare clean metal for the return-current connection as well.
If steel is galvanized, painted, plated, oily, chemically contaminated, or coated with an unknown material, identify the material before heating it. Follow the applicable safety data sheet, equipment instructions, employer procedures, and site requirements. If the coating or prior service cannot be identified, stop and obtain competent guidance rather than relying on E6011’s reputation for penetration.
Root work and poor fit-up
That general association is not evidence that it is qualified for a particular joint.
Where a procedure applies, root opening, land, bevel, backing, progression, polarity, pass sequence, and acceptance requirements must come from that procedure. For routine noncritical practice or repair work, a coupon matching the actual joint can help determine whether the selected diameter and setup are controllable. A practice coupon does not replace any required procedure or welder qualification.
Thin material requires caution
The supplied commercial sources conflict on thin-sheet suitability. One lists a small E6011 diameter for thin sheet, while another broadly discourages E6011 on sheet metal. The evidence therefore does not support a universal minimum thickness.
The defensible conclusion is narrower: E6011’s penetrating arc can make heat and burn-through more difficult to control on thin steel. Results depend on thickness, joint type, fit-up, diameter, current, polarity, machine response, and operator technique.
If E6011 is permitted for the job:
- Select the smallest suitable diameter approved for the setup.
- Begin conservatively within the manufacturer’s range.
- Test on scrap matching the work.
- Reassess the process or electrode if the puddle cannot be controlled without burn-through or poor fusion.
Code-governed and safety-critical work
A product page may mention pressure pipe, structural steel, truck frames, shipbuilding, or similar applications. Such a list does not establish approval for a particular pressure boundary, structural connection, material grade, or service condition.
For regulated or safety-critical welding, first identify the governing code, project specification, repair standard, or qualified procedure. Follow its requirements for electrode selection, polarity, preparation, welding variables, qualification, inspection, and acceptance. Generic online advice ends where those documents begin.
E6011 Amperage Chart by Rod Diameter
An E6011 amperage chart is best used as a starting map. The consensus ranges below combine multiple commercial tables while preserving the variation among them.
| E6011 diameter | Consensus starting range | Ranges reported in supplied commercial guidance | Practical starting approach |
|---|---|---|---|
| 3/32 inch, about 2.4 mm | Approximately 40–90 A | 40–85 A or 40–90 A | Start near the middle for a flat test bead; move lower when tighter puddle control is needed |
| 1/8 inch, about 3.2 mm | Approximately 75–125 A | 75–125 A or 75–130 A | A common middle size when the joint, machine, and exact product support it |
| 5/32 inch, about 4.0 mm | Approximately 110–165 A | 110–160 A or 110–165 A | Requires more output and generally suits heavier work than the smaller diameters |
Simpleweld reports 40–85 A for 3/32 inch, 75–130 A for 1/8 inch, and 110–160 A for 5/32 inch. It also recommends changes of approximately 5–10 A at a time and a lower starting point for vertical work. These are generalized commercial recommendations, not manufacturer limits for every E6011 product (Simpleweld diameter and amperage table).
Product-specific exception: Forney’s 1/8-inch item 31205 has a stated range of 55–125 A, rather than the consensus 75–125 A range. Forney also lists AC, DCEP, and DCEN for that particular item. This illustrates why the exact package or manufacturer documentation must override a consensus chart (Forney item 31205 specifications).
Diameter alone does not determine the final setting. The useful point within an approved range can shift with:
-
Position: Vertical and overhead welding generally require a smaller, more controlled puddle.
-
Joint design: Open roots, tight laps, grooves, and fillets do not respond identically.
- Current type and polarity: Approved options and arc behavior can vary by product and machine.
-
Electrode brand and condition: Coating formulation and physical condition affect operation.
-
Technique: Arc length, angle, travel speed, and manipulation alter the bead without changing the machine setting.
A practical starting method
- Find the manufacturer’s range for the exact electrode and diameter.
- Confirm the approved current type and polarity.
- For flat work, choose an initial setting near the middle of the range.
- For vertical or overhead work, begin toward the lower portion.
- Run a short bead on comparable scrap.
- Adjust by approximately 5–10 A at a time, remaining inside the approved range.
- Keep the other major variables steady so the comparison is meaningful.
Worked 1/8-inch example
Suppose the selected 1/8-inch E6011 package lists 75–125 A. The midpoint is 100 A, so 100 A is a reasonable first test setting for a flat bead on matching scrap.
During the test, check whether:
- The arc starts and remains stable without excessive arc length.
- The puddle remains controllable.
- The bead wets into both edges.
- The rod repeatedly sticks.
- Undercut, excessive spatter, or a narrow rope-like profile develops.
- Heat begins to overwhelm the joint.
If the rod repeatedly sticks after polarity, connections, arc length, and electrode condition have been checked, try a small current increase. If the puddle is excessively fluid, undercut develops, or heat becomes difficult to control, reduce current slightly and reassess arc length and travel speed.
This example does not make 100 A universally correct. Another 1/8-inch product may have a different approved range, as the Forney example shows.
Ranges above 5/32 inch are omitted because the supplied evidence does not establish a meaningful multi-source consensus for larger diameters.
Choosing AC, DCEP, or DCEN
AC and DCEP are repeatedly listed for E6011 in the supplied product literature and commercial guides. DCEN appears in documentation for some products, but it should be treated as product-specific rather than universally approved.
Use this sequence:
- Read the package or current manufacturer datasheet.
- Identify the approved current type and polarity.
- Confirm that the welding machine can supply that arrangement.
- Connect the holder and work lead as directed by the machine manufacturer.
- Choose an amperage within the electrode manufacturer’s range.
- Test the setup on comparable scrap.
| Option | How to treat it |
|---|---|
| AC | Broadly listed for E6011 and useful with an AC-only machine; confirm the exact electrode and machine capability |
| DCEP | Broadly listed, but still verify the package or datasheet |
| DCEN | Use only when documentation for the exact product permits it |
Why AC compatibility matters
AC compatibility is a major practical reason for choosing E6011, particularly with AC transformer machines. It provides a cellulosic E60-series option without requiring DC output.
That does not mean every AC machine will run every E6011 product identically. Machine design, available output, lead condition, electrode brand, electrode condition, and operator technique can affect starting and arc stability.
Some commercial guides describe DC operation as smoother or easier to start than AC. That should be treated as generalized operating guidance, not a guaranteed result for every machine, electrode, or polarity.
When DCEN is acceptable
Forney explicitly lists AC, DCEP, and DCEN for its 1/8-inch item 31205. Other supplied product literature emphasizes AC and DCEP. Therefore:
- If the package lists AC and DCEP only, do not add DCEN based on a generic chart.
- If the package expressly permits DCEN, it is an available setup option.
- If the documentation is unclear, obtain clarification or use an explicitly approved arrangement.
Do not assume E6011 runs equally well on every polarity. The supplied evidence does not establish universal polarity-specific differences in penetration, deposition, arc stability, or bead shape.
A Repeatable Setup and Technique Sequence
A repeatable sequence is more useful than memorizing one amperage. It separates electrode selection, electrical setup, preparation, and technique so that each can be evaluated.
1. Identify the steel and coating
Confirm that the base metal is carbon or mild steel suitable for the intended repair or procedure. Identify paint, galvanizing, plating, oil, chemical residue, or unknown coatings before applying heat. If the material or coating cannot be identified, stop and obtain appropriate guidance.
2. Determine whether a governing procedure applies
Before choosing the rod, determine whether the work is controlled by a welding procedure, code, project specification, repair standard, inspection plan, or employer requirement. If it is, use the electrode classification, diameter, polarity, progression, preparation, and current range permitted by those documents.
3. Select the diameter
Choose a diameter that the joint and machine can support.
- Smaller electrodes generally require less current and can provide a more manageable puddle on thin edges or out-of-position work.
- Larger electrodes generally require more output and introduce more heat.
- Access, joint geometry, required bead placement, and pass sequence matter alongside material thickness.
Do not select diameter from a universal thickness chart alone. In some joints, several controlled passes with a smaller electrode may be more manageable than one oversized pass.
4. Verify current type and polarity
Read the package and confirm whether the exact product permits AC, DCEP, or DCEN. Connect the leads accordingly. If the machine’s terminal markings or controls are unclear, consult its manual.
5. Inspect the circuit and electrode
Check the holder, leads, connectors, and return-current connection. Attach the work clamp to clean metal near the work. Inspect the electrode for cracked, missing, contaminated, or visibly deteriorated coating.
6. Choose a starting current
For flat work, the middle of the manufacturer’s range is a practical first setting. For vertical or overhead work, begin toward the lower portion of the range to help maintain a smaller, more controllable puddle.
This is an initial test setting, not a value that must be retained regardless of arc behavior.
7. Prepare comparable scrap
Use scrap that resembles the work in material, thickness, joint orientation, and surface preparation. A flat bead on thick, clean plate provides limited information about an overhead repair on thin, weathered tubing.
8. Run a short test bead
Hold a consistent arc and observe:
- Ease of starting and maintaining the arc
- Tendency to stick
- Puddle size and response
- Fusion at both edges
- Bead width and profile
- Undercut and spatter
- Heat effect on thin edges
- Whether the coating burns consistently
A test bead helps tune the setup. It does not replace any inspection or qualification required by the job.
9. Match manipulation to the joint
A drag or pull direction is common general guidance for E6011, but it is not an inviolable rule for every joint, position, or procedure.
Whip-and-pause is another commonly described technique. Avoid memorizing a universal whip distance or pause time; the appropriate motion depends on the joint, root opening, diameter, current, position, and visible puddle response.
Arc length, work angle, travel angle, and travel speed interact with amperage. An incorrect angle can direct the arc away from the joint. Increasing current does not reliably correct those technique problems.
10. Change one major variable at a time
If the bead is unsatisfactory, avoid changing current, travel speed, angle, and arc length simultaneously.
A more useful sequence is:
- Correct an obviously long or inconsistent arc.
- Run another short bead.
- If sticking continues, check polarity, connections, and electrode condition.
- Retest under similar conditions.
- Make a small current adjustment only if the other variables appear sound.
Changing one major variable at a time makes it easier to identify what improved or worsened the result.
11. Use multiple passes when appropriate
For a wide joint, several controlled passes may be easier to place than one oversized pass. The required pass sequence, cleaning, and maximum bead size must follow the governing procedure when one applies.
A generic technique guide cannot qualify a welder or welding procedure for structural, pressure, or regulated work.
Troubleshooting Sticking, Spatter, Undercut, and Poor Penetration
Amperage affects the arc and puddle, but it is not the only cause of an unsatisfactory bead. Diagnose the setup before repeatedly turning the current in one direction.
| Symptom | Possible causes | Check first | Controlled adjustment |
|---|---|---|---|
| Electrode repeatedly sticks | Current too low, arc too short, wrong polarity, damaged rod, poor connection | Package polarity, connections, clamp contact, rod condition, starting technique | Increase current slightly if the other checks pass |
| Arc is unstable | Current too low, excessive arc length, poor connection, unsuitable output, damaged coating | Arc length, circuit connections, polarity, electrode condition | Adjust in a small increment and retest |
| Poor penetration | Current too low, travel too fast, poor arc direction, inadequate joint preparation | Joint geometry, angles, speed, polarity | Increase current slightly only if setup and technique are sound |
| Narrow, rope-like bead | Current too low, travel too fast, poor angle, inadequate manipulation | Speed, arc length, edge wetting | Correct one variable at a time; then consider a small increase |
| Heavy spatter | Current too high, long arc, contamination, poor technique, circuit problem | Arc length, cleanliness, polarity, connections | Reduce current slightly if the setup checks out |
| Undercut | Current too high, excessive travel speed, poor angle, long arc | Speed, angle, edge control, arc length | Reduce current slightly if heat is clearly excessive |
| Rapid electrode consumption | Current too high, long arc, unsuitable diameter | Approved range, arc length, rod size | Reduce current within the approved range |
| Excessive heat or burn-through tendency | Current too high, rod too large, slow travel, poor fit-up, thin edge | Diameter, joint gap, fit-up, speed | Reduce current or reconsider the diameter or process |
| Erratic results between beads | Loose connection, machine issue, varying technique, damaged rods, inconsistent preparation | Circuit, machine, electrodes, preparation | Do not chase the problem only with amperage |
ArcCaptain identifies sticking, rope-like or uneven beads, and poor penetration as possible signs of insufficient current. It identifies heavy spatter, undercut, and rapid electrode consumption as possible signs of excessive current, while also recognizing the effects of diameter, thickness, current type, machine output, and technique (ArcCaptain setup and troubleshooting guide).
A usable initial setting should support:
- Stable operation
- A controllable puddle and bead width
- Fusion at the visible bead edges
- Manageable spatter
- Heat that does not overwhelm the joint
- Repeatable starts and travel
These observations are useful for setup.
If the rod sticks
Check, in order:
- Approved polarity
- Secure lead connections
- Clean return-current contact
- Electrode coating condition
- Starting technique and arc length
- Current relative to the manufacturer’s range
If those checks are satisfactory, increase current by a small step and repeat the test under similar conditions.
If spatter or undercut increases
Heavy spatter can result from excessive current, but it can also reflect a long arc, contamination, unsuitable polarity, poor manipulation, or a circuit problem. Undercut can similarly result from excessive heat, excessive travel speed, poor angle, or failure to fill the edge.
Correct an unnecessarily long arc and obvious travel problems before using current to conceal technique. If heat remains excessive, reduce amperage slightly and compare another bead.
Know when to stop adjusting
If operation remains erratic while the machine is set within the manufacturer’s range, stop welding and inspect the machine settings, leads, connections, work clamp, selected polarity, electrode condition, and joint preparation. Do not continue moving amperage up and down around an unresolved equipment, circuit, or consumable problem.
E6011 Compared with E6010, E6013, and E7018
These comparisons are deliberately narrow. Electrode selection must follow the job specification, governing procedure, and manufacturer documentation rather than a simplified ranking.
| Electrode | Useful high-level distinction | Selection boundary |
|---|---|---|
| E6011 | Cellulosic, all-position electrode commonly described as penetrating and fast-freezing; AC and DCEP are broadly listed | Use only when its approved power compatibility and operating behavior suit the job |
| E6010 | Commonly associated with penetrating, fast-freezing behavior | The supplied guides emphasize E6011’s AC compatibility as the practical distinction; do not assume interchangeability |
| E6013 | Commercial guidance describes it as smoother-looking and less penetrating than E6011 | Bead appearance and penetration do not create a universal strength ranking |
| E7018 | A different classification associated with low-hydrogen requirements | E6011 is cellulosic and is not a low-hydrogen substitute |
E6011 versus E6010
The clearest evidence-supported distinction here is power compatibility. E6011 is commonly listed for AC as well as DC, making it a practical option for AC-only machines. That does not mean E6010 and E6011 may be exchanged freely under a welding procedure.
E6011 versus E6013
The supplied commercial guidance characterizes E6011 as more penetrating and E6013 as producing a smoother-looking, less-penetrating result. This is a general operating comparison, not evidence that either classification is universally stronger.
Keep these questions separate:
- How the arc penetrates
- How the bead looks
- What deposited-metal classification applies
- Whether fusion is adequate
- Whether the joint design carries the required load
- Whether the procedure permits the electrode
A smooth cap does not compensate for poor fusion, and an aggressive-looking bead does not prove weld quality.
E6011 versus E7018
The essential boundary is hydrogen classification. E6011 is cellulosic and must not be treated as a low-hydrogen replacement for E7018. If the governing documents require a low-hydrogen electrode or another specific classification, E6011’s compatibility with an available machine is not a valid basis for substitution.
Choose E6011 for its documented current compatibility and commonly described penetrating, fast-freezing behavior only when those characteristics suit the joint and the governing requirements permit it.
Surface Preparation, Storage, and Safety Boundaries
E6011’s reported tolerance for rust, scale, paint, and imperfect surfaces should lead to realistic expectations—not skipped preparation.
Prepare the joint and current path
Where practical:
- Remove loose rust and scale.
- Remove paint around the weld area.
- Remove oil, grease, moisture, and dirt.
- Clean the return-current connection area.
- Inspect the steel beneath coatings.
- Clean between passes as required by the applicable procedure.
It also makes it easier to distinguish a settings problem from a joint-preparation problem.
Treat coatings as hazards, not merely arc obstacles
Galvanized, painted, oily, plated, chemically contaminated, and unknown-coated steel require more than a decision about arc performance. Identify the coating or residue and follow the applicable safety data sheet, employer procedure, and site controls before welding.
An electrode’s ability to maintain an arc through contamination does not establish that the fumes are acceptable, that heating is safe, or that the resulting weld meets the job requirements.
Store rods according to the manufacturer
One cited E6011 seller advises dry storage, but the supplied evidence does not establish a universal storage temperature, humidity limit, rebaking cycle, shelf life, or discard rule. Follow the instructions for the exact electrode.
Set aside rods with visibly cracked, flaking, missing, contaminated, or otherwise compromised coating. Obtain manufacturer guidance rather than inventing a shop rebake or recovery procedure.
Maintain the safety baseline
Welding exposes people to electrical current, fumes, and ultraviolet radiation. Suitable PPE and ventilation are fundamental, and the equipment manual and site rules override generic articles (Welder Facts informational-use and safety notice).
This article does not replace:
- The electrode or material safety data sheet
- Equipment inspection and manufacturer instructions
- A qualified welding procedure
- Applicable hot-work requirements
- Employer respiratory or ventilation requirements
- Project specifications or governing codes
Frequently Asked Questions
What amperage should I use for a 1/8-inch E6011 rod?
A useful commercial consensus starting range is approximately 75–125 A, with one supplied table extending the upper end to 130 A. Check the exact package first: Forney’s 1/8-inch item 31205 lists 55–125 A, demonstrating that product-specific documentation can differ from the consensus range.
If the selected rod lists 75–125 A, approximately 100 A is a reasonable first setting for a flat-position test bead on matching scrap. Adjust by roughly 5–10 A at a time while remaining within the manufacturer’s range. For vertical or overhead work, begin toward the lower portion and tune for a controllable puddle.
Can E6011 run on an AC welder?
Yes. AC operation is broadly listed for E6011 and is one of its practical advantages for AC-only transformer machines. Confirm that the exact electrode permits AC and that the machine can provide suitable output for the selected diameter.
Machine design, connections, electrode condition, and technique can affect starting and arc stability, so different AC machines and E6011 products may not behave identically.
Can I use E6011 on rusty or painted steel?
E6011 is commonly selected for weathered or imperfect mild-steel surfaces because commercial literature describes it as penetrating and relatively tolerant of rust, scale, and residual coatings. That is not permission to weld directly through contamination without assessment or preparation.
Remove loose rust, paint, oil, grease, moisture, and dirt where practical. Identify galvanized, plated, chemically contaminated, or unknown coatings before applying heat, and follow the applicable safety data sheet and site requirements.
Should an E6011 welding rod be dragged or whipped?
A drag or pull direction is common general guidance. Whip-and-pause is also commonly used to manage the keyhole, puddle, and fast-freezing behavior. Neither method is mandatory for every joint.
Use the manipulation permitted by the procedure and appropriate to the position, fit-up, and joint geometry. Maintain a controlled arc and avoid using a large amperage change to compensate for poor angle, travel speed, or arc length.
Is E6011 a low-hydrogen electrode like E7018?
No. E6011 is a cellulosic electrode, not a low-hydrogen electrode. It must not be substituted where a procedure, code, project specification, or hydrogen-control requirement calls for E7018 or another specified classification.
For practical initial setup, verify the exact electrode’s approved polarity and amperage, select a diameter suited to the joint and machine, begin near the middle of the stated range on comparable scrap, and tune in small steps while watching the arc and puddle. E6011 can be a versatile choice for penetrating, all-position mild-steel repairs, but its tolerance for imperfect material does not replace cleaning, hazard controls, qualified procedures, or project requirements.