
Choose a Stick Welder by Rod, Power and Duty Cycle
Match a stick welder to your electrodes, input power and duty cycle, then check polarity, the work circuit and technique before changing amperage.
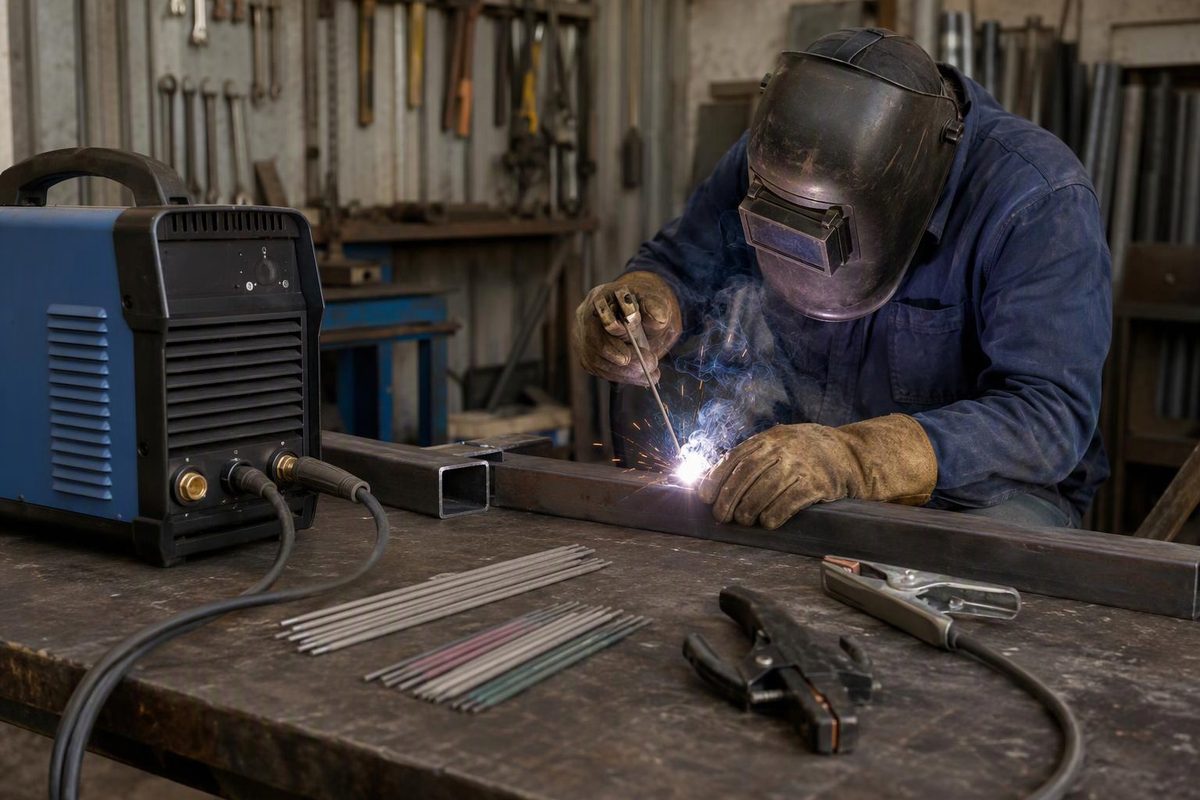
A stick welder should be selected around the electrodes and welding current your work requires—not just the largest amperage number on the case. Check its stick output on your available supply voltage, electrode compatibility and duty cycle at your working current. Once those match, diagnose arc problems through the welding circuit and technique before blaming the machine.
What a stick welder does—and where it fits
Stick welding, or shielded metal arc welding (SMAW), uses a consumable coated electrode. The electrode supplies filler metal and flux protection, so the process does not require an external shielding-gas cylinder. It is useful for outdoor steel repairs and work in drafty locations, but requires electrode changes and slag cleanup. For thin sheet or long production seams, compare it with MIG or self-shielded flux-core rather than assuming stick is the simplest overall choice. Miller’s process-selection guide explains those trade-offs.
A stick-capable power source uses constant-current characteristics: current remains comparatively stable as the operator changes arc length. That does not make arc length unimportant. A long arc raises arc voltage and can increase spatter, undercut and porosity. Lincoln’s Invertec manual identifies its stick/TIG machines as constant-current sources; Miller’s technique guidance explains the consequences of excessive arc length.
Choose the machine around the rod and workload
Check output polarity and electrode support
AC input does not mean AC welding output. A machine plugged into an AC receptacle may produce DC only. Read the output specifications and electrode instructions separately.
For DC electrode positive, or DCEP, the electrode-holder lead connects to positive and the work lead to negative. DC electrode negative, or DCEN, reverses those connections. Select the polarity specified for the actual electrode—not whichever arrangement happened to work with the previous rod. Lincoln’s connection instructions show both arrangements.
If your procedure requires E6010, look for explicit manufacturer support and any required mode selection. For example, Miller’s Maxstar 161 manual, sections 6-2 through 6-4, specifies a separate Stick 6010 mode with optimized parameters. A generic “stick” label tells you less than a consumable-specific statement in the manual. See how stick rods must match the metal and machine before choosing the power source.
Compare stick ratings on the voltage you will use
Dual-voltage capability does not promise identical performance on both supplies. A useful documented example is the Maxstar 161: its September 2020 manual lists the following stick ratings, at ambient temperatures up to 104°F (40°C):
| Input supply | Stick current range | Selected rated output |
|---|---|---|
| 120 V | 20–90 A | 90 A at 23.6 V DC, 30% duty cycle |
| 240 V | 20–160 A | 160 A at 26.4 V DC, 20%; 130 A at 25.2 V DC, 60% duty cycle |
These are model-specific manual ratings, not a buying recommendation. They illustrate why a headline maximum cannot substitute for the stick-output table. The same manual lists different TIG ratings. Maxstar 161 owner’s manual, sections 4-4 and 4-7.
Duty cycle is the permitted welding time within a ten-minute period at the stated load. A 20% rating means two minutes of welding followed by eight minutes of cooling under the specified conditions. Compare machines at the amperage you need, not at unrelated maximum-output points.
The electrode range helps establish that need. Lincoln publishes 90–160 A on DCEP for 1/8-inch (3.2 mm) Excalibur 7018 MR, and 130–210 A for its 5/32-inch (4.0 mm) version. Those ranges show why regularly using larger rods changes the equipment requirement; they are not universal settings for every E7018 product or joint. Excalibur operating ranges.
Check the complete installation
Before buying, confirm supply voltage, phase, plug, required electrical service, lead connectors and included holder/work cables. Use the machine’s installation instructions and applicable electrical codes for circuit sizing, with qualified personnel performing the installation. Do not size the branch circuit from welding-output amps, or assume a plug adapter increases the available power. Miller’s electrical service and installation instructions distinguish input-service requirements from output ratings.
For portable use, check generator compatibility in the exact manual, including voltage, frequency and power requirements. Lincoln’s Invertec manual warns that unsuitable generator voltage spikes can damage those machines. If you need extra reach, use the welder extension-cord selection guide alongside the equipment instructions.
Set up before tuning amperage
Start with a safe work area: suitable helmet and safety glasses, dry insulating gloves, flame-resistant clothing, protection for nearby people, and controlled fire hazards. The electrode and work circuit are live whenever output is on. Do not touch live electrical parts, and insulate yourself from the work and ground. Follow the equipment manual’s safety instructions.
Then work through this sequence:
- Identify the material and joint. Establish preparation, fit-up, position and any required welding procedure before picking a rod.
- Verify the electrode. Check classification, diameter, condition, polarity and manufacturer’s current range. Follow product-specific storage requirements, especially for E7018 low-hydrogen electrodes.
- Clean the weld area and clamp contact. Stick’s tolerance of some contamination is not permission to leave rust, oil or coatings in the joint.
- Inspect the circuit with power disconnected. Check cable insulation, holder, clamp and connectors; replace damaged components. Secure the work lead to clean metal. OSHA distinguishes this work connection from grounding the machine frame. OSHA arc-welding requirements.
- Set polarity and current, then test on representative scrap. Use the consumable range and applicable procedure. A flat bead on a plate does not establish settings for a vertical groove or open root.
Keep your head out of the fume plume and provide appropriate ventilation or extraction. Outdoor welding does not guarantee adequate ventilation, and coatings can add hazardous exposures. OSHA’s welding-fume guidance.
Diagnose the arc before turning up the amps
After verifying mode, polarity and connections, use the symptom to choose the next check:
| Symptom | First checks |
|---|---|
| Rod sticks or arc repeatedly goes out | Current too low for that electrode; arc held too short; poor work connection |
| Heavy spatter or erratic arc | Excessive arc length first, then current, electrode compatibility and connections |
| Puddle is excessively fluid; rod overheats well before consumption | Current may be too high; check diameter, position and consumable range |
| Wide, convex bead that appears to sit on the surface | Travel may be too slow, keeping heat in the puddle rather than at the leading edge |
| Narrow, undersized bead or undercut | Travel may be too fast; also check long arc and excessive current |
These are diagnostic possibilities, not definitive diagnoses. Miller recommends adjusting current in 5–10 A increments and gives an initial arc-length guide of no more than the electrode’s metal-core diameter, subject to the electrode and application. Keep adjustments within any applicable procedure limits, and change one variable at a time so the result tells you something. Miller’s stick-welding technique guide.
If output stops with a thermal indication, follow the manual’s cooling instructions and reassess duty cycle and airflow. Repeated trips or persistent faults warrant qualified service—not bypassing protection. The Maxstar manual’s overheating and troubleshooting sections provide model-specific instructions. A smoother arc and cleaner bead are useful feedback, but do not prove internal fusion or certify a structural or pressure weld; apply the specified procedure and inspection requirements.