
Choose Welding Gear for the Process, Position and Exposure
Build a welding gear kit with suitable PPE, process-specific accessories, fume controls and fit-up tools—and check compatibility before buying.
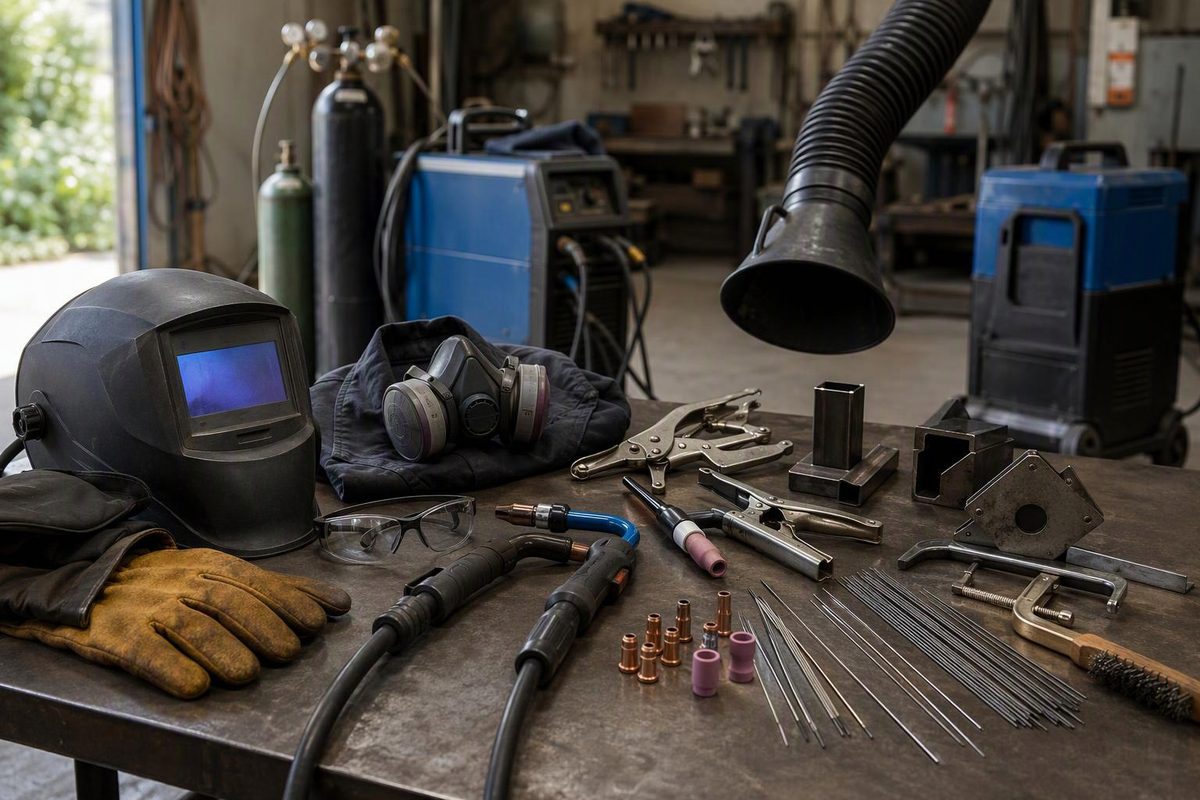
A useful welding gear kit covers four jobs: protecting the welder, controlling hazards around the work, completing the welding circuit, and preparing the joint. A helmet-and-gloves bundle covers only part of that list.
Start with the metal, thickness, joint, welding position and process. Then check the machine manual and, where applicable, the welding procedure specification (WPS). Those choices determine which accessories and consumables belong in the kit—not whether a package is advertised as “complete.”
This checklist covers conventional MIG, flux-core, stick and TIG arc welding. It is not a complete safety plan for confined spaces. Handheld laser welding needs a separate safety assessment and equipment selection.
Personal welding gear: cover the exposure
The basic wearable kit is a welding helmet, safety glasses with side protection, welding gloves, flame-resistant protective clothing and protective footwear. Add hearing protection and head, neck or additional body coverage according to the task. Arc radiation, flying slag and molten metal are different hazards; one item does not cover them all. CCOHS’s welding PPE guidance explains the protection each requires.
- Helmet: Match the filter shade to the process, electrode or wire diameter, and operating current. For an auto-darkening model, check its specified operating range and follow the manufacturer’s pre-use checks. Viewing area and comfort matter only after suitability is established. See the auto-darkening welding helmet selection guide.
- Safety glasses: Wear them beneath the welding helmet. They remain important when the helmet is raised for chipping or cleanup; CCOHS recommends glasses with side shields or goggles even when other eye and face protection is used.
- Gloves: Choose gloves designed for welding, with enough heat and spatter protection for the task while preserving the dexterity needed to control the torch or electrode. Use gauntlet cuffs or suitable sleeves to cover wrists and forearms. Keep gloves dry and replace damaged pairs.
- Clothing and footwear: Cover exposed skin, close collars and cuffs, avoid trouser cuffs, and wear trousers over boot tops. Keep clothing free of oil and other combustible contamination. Ordinary synthetic fabrics can melt and cause severe burns. Follow the garment’s care instructions. Source: CCOHS
Position changes the exposure. Gear that provides adequate coverage for bench work may leave openings for falling sparks during overhead welding. Check the kit while reaching and bending: jacket-to-trouser overlap, wrist coverage and neck protection should remain intact. The FR clothing guide helps compare coverage and materials rather than relying on the FR label alone.
The welding area needs gear, too
Fume control is part of the setup, not an optional upgrade after the machine purchase. Identify the base metal, filler and coatings before choosing controls. Local exhaust captures fumes near their source; an open garage door or outdoor location does not guarantee adequate ventilation. Position extraction so fumes move away from the breathing zone, and keep exhaust discharge away from other workers. OSHA’s welding fume fact sheet explains these controls and their limitations.
Do not select a respirator simply because it fits under the helmet. Selection depends on contaminants and exposure. For required workplace use under U.S. OSHA rules, the respiratory protection program includes medical evaluation, training and fit testing for tight-fitting respirators. A particulate filter alone does not protect against gases or oxygen deficiency. OSHA 1910.134
Also plan for:
- Welding screens or shields to protect nearby people from arc radiation without obstructing ventilation.
- Removal or suitable shielding of combustible materials.
- Fire-extinguishing equipment ready for use, plus the site’s hot-work authorization and fire-watch arrangements where required.
These are separate controls: an arc screen is not automatically suitable protection against hot slag. OSHA’s general welding requirements address personnel protection and fire precautions. Follow the rules applicable to your jurisdiction and worksite; the cited OSHA regulations are U.S. general-industry standards.
Add the process-specific equipment
All four processes need a suitable power source and a sound work-lead connection. Beyond that, their supporting gear differs.
| Process | Equipment and consumables to check |
|---|---|
| MIG with solid wire | Gun, wire feeder, compatible wire, contact tips, nozzle, liner and drive rolls; specified shielding gas, regulator/flow-control equipment and hose |
| Self-shielded flux-core | Compatible feeder and gun, specified tubular wire, suitable feeder parts and contact tips; slag-removal tools; no external shielding-gas supply |
| Gas-shielded flux-core | Compatible feeder and gun, specified tubular wire and shielding-gas system; slag-removal tools |
| Stick | Electrode holder, electrode and work leads, suitable coated electrodes, slag-removal tools and product-appropriate electrode storage |
| TIG | Compatible torch and connections, tungsten, matching torch consumables, shielding-gas system and filler rod where required; compatible current control and cooling equipment where the setup requires them |
The basic circuits are described in Telwin’s wire-welding, stick and TIG guides. Crucially, “flux-core” does not tell you whether a cylinder is needed: gas-shielded wire requires external gas; self-shielded wire does not. Use the wire datasheet for gas, polarity and operating requirements. Hobart Brothers
Buy replacement parts by the gun or torch model and supported consumable size, not by appearance. Incorrect drive-roll size, an unsuitable liner or a worn contact tip can cause erratic feeding, bird-nesting or burnback. Bernard/Tregaskiss’s wire-feeding guidance identifies these mechanisms.
For gas processes, include suitable cylinder restraint and handling equipment. Check cylinder labels, fittings and leak-test instructions; do not identify the gas by cylinder colour. CCOHS cylinder guidance
Preparation tools and the final compatibility check
A practical starting set includes a stable work surface, fit-up clamps, tape measure, square, marking tools, suitable cutting or grinding equipment, and brushes appropriate to the material. Add inspection gauges when the job requires dimensions they measure. Grinding and cutting need their own PPE and tool-safety checks.
Before buying more gear—or blaming the welder for a poor arc—check in this order:
- Power supply: Does the installation meet the machine manual’s voltage and supply requirements?
- Welding circuit: Are connections secure, insulation intact and the work lead firmly attached? The work clamp is not a substitute for protective grounding. See the welding ground and return-path guide.
- Process parts: Do the wire or electrode, polarity, feeder parts, gas and torch components match the documented setup?
- Condition: Are tips, liners, hoses, lenses and gloves serviceable?
For U.S. general-industry workplaces, OSHA requires manufacturer operating instructions to be followed and welding cables with damaged insulation or exposed conductors to be replaced. OSHA 1910.254
For purchasing, mark each item already owned, included and compatible, or still needed. Complete the safe, compatible setup before spending on convenience accessories. Equipment enables the work; it does not establish weld acceptance.