
Is a Used Handler 135 Still a Practical Welder?
Archived specs list 115V input, 30–135A output and a 22-gauge-to-3/16-inch range; use the inspection steps to judge a used machine.
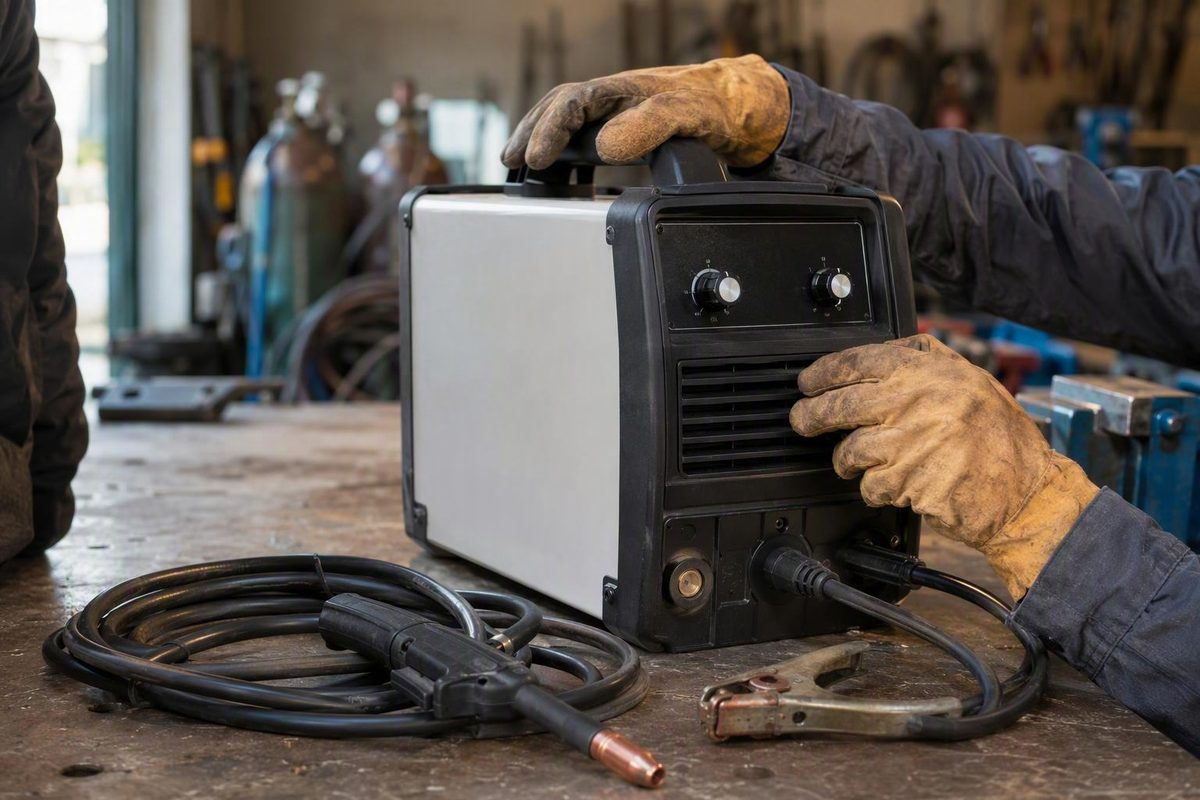
Its principal advantages are straightforward: it operates from household power and can run either self-shielded flux-core wire or gas-shielded solid wire.
Its limitations matter just as much. The available specifications come from an archived retailer listing rather than current Hobart documentation, the published duty cycle lacks a stated output and test basis, and the listed single-pass capacity ends at 3/16 inch. Age also creates uncertainty around the gun, feed system, cables, switches, and internal electrical components.
This guide is therefore a secondary-source assessment, not a substitute for the original Handler 135 manual or serial-number-specific service information.
Short verdict: A used Hobart Handler 135 may be worthwhile when it is inexpensive relative to current alternatives, weld-tested under load, and intended for sheet metal, practice, repairs, or light hobby fabrication. It is not automatically a good purchase because it carries the Hobart name. For thicker stock, long welds, or frequent fabrication, compare the total cost with a newer dual-voltage machine before buying or repairing an old unit.
What the Hobart Handler 135 Is—and What It Is Not
The machine covered here is the Hobart Handler 135, model 500414. Northern Tool’s archived listing identifies it as item 164692 and marks it “no longer available.” The retailer describes a portable wire welder operating from standard household power, with provisions for shielding gas or self-shielded flux-core wire.
Do not confuse it with the later Hobart Handler 140 or the Miller Millermatic 135. Discussions of those machines can illustrate why owners choose household-voltage equipment or move to larger welders, but their ratings, controls, packages, warranties, and parts are not Handler 135 specifications. Similar names or shared corporate relationships do not establish interchangeability.
Forum participants commonly describe the Handler 135 as a useful beginner or household-power machine. The same discussions tend to favor larger 220V or dual-voltage equipment when work becomes thicker, more frequent, or more time-sensitive. These are anecdotal owner reports rather than controlled performance tests, but they are consistent with the machine’s modest published capacity. A 2016 owner discussion illustrates both the Handler 135’s beginner appeal and the preference for larger machines for sustained work.
That makes the Handler 135 a condition-dependent purchase:
- Potentially worthwhile: Correct model, complete setup, sound cables, smooth feeding, stable test arc, functioning gas system where applicable, sensible price, and light-duty intended use.
- Questionable: No test weld, damaged gun cable, unknown storage history, missing process equipment, or a price close to that of a newer warranted welder.
- Poor match regardless of condition: Repeated thick-stock fabrication, production work, long uninterrupted welds, or jobs requiring more output and voltage flexibility.
Buy the test results, not the badge, the seller’s story, or the remembered original price.
Handler 135 Specifications: What the Available Listing Actually Supports
The following figures come from Northern Tool’s archived retailer page. They should not be presented as current, manufacturer-verified specifications.
| Item | Archived retailer listing |
|---|---|
| Model | Hobart Handler 135, model 500414 |
| Input power | 115V standard household current |
| Published output | 30–135 amps |
| Voltage control | Four stepped output-voltage settings |
| Wire-feed control | Wire-feed tracking |
| Processes | Gas-shielded wire welding or self-shielded flux-core |
| Published single-pass range | 22 gauge through 3/16 inch |
| Published duty cycle | 20%; associated output and test basis not stated |
| Dimensions | 12 3/8 in. H × 10 5/8 in. W × 18 7/8 in. D |
| Listed ship weight | 63.6 lb |
| Protection and controls | Built-in contactor and self-resetting thermal-overload protection |
| Gas equipment | Built-in gas valve |
| Historically included gas equipment | Regulator and hose |
| Historical warranty | 12 months parts and 12 months labor |
The same listing describes the original package as including a 10-foot MIG gun, a 10-foot work lead and clamp, power cord, 8-inch spool adapter, extra .030-inch contact tips, and a one-pound spool of .030-inch self-shielded flux-core wire. Those package details can help identify missing equipment, but they do not establish what should accompany every secondhand unit today. Northern Tool’s archived Handler 135 listing supports the specifications and original-package details above.
The historical warranty should not affect present valuation. The available evidence provides no basis for assuming that coverage remains on a discontinued used machine.
Two published numbers need careful interpretation.
First, 3/16 inch is a retailer-listed single-pass ceiling, not a promise of adequate fusion in every weld. Joint geometry, preparation, material condition, wire, process, available input power, settings, and operator technique all affect the result.
Second, the listing gives a 20% duty cycle without identifying its associated output or test basis. A duty-cycle percentage is meaningful only under defined conditions. It therefore cannot be converted responsibly into a universal weld-and-rest schedule for this machine.
Realistic Capability: Suitable Jobs, Practical Limits, and Duty Cycle
The Handler 135 is best judged against the work you need to perform rather than by asking whether it is simply a “good welder.”
| Job or operating pattern | Fit | Reason |
|---|---|---|
| Learning wire-welding fundamentals on coupons | Good | Simple controls and household-power operation suit practice |
| Thin sheet and small patches | Good | Consistent with the machine’s light-duty role when correctly configured |
| Small brackets, stands, carts, and noncritical repairs | Good | Reasonable when material and weld length remain modest |
| Portable work where only suitable household power is available | Good | Power-source accessibility is a central advantage |
| Outdoor repair with self-shielded flux core | Good to conditional | No external shielding-gas envelope, but setup and material condition still matter |
| Material near the published upper range | Conditional | Preparation, input power, wire, technique, and joint geometry become increasingly important |
| Long welds or repeated high-output operation | Poor | Thermal limits are likely to interrupt work |
| Repeated thick-stock fabrication | Poor | Limited output and duty cycle reduce margin and productivity |
| Production work | Poor | Age, low listed duty cycle, and uncertain repair support work against dependable throughput |
| Safety-critical or code-regulated joints | Not established | Machine capacity alone cannot qualify equipment, procedure, or operator |
The conservative approach is to buy the Handler 135 for work comfortably inside its operating envelope, not because you intend to run continuously at the edge.
Because the published percentage lacks a defined output and test basis, the useful conclusion is not a precise timing formula. It is that sustained high-output welding may force cooling interruptions.
Repeated interruption during a routine job may mean that the task exceeds the machine’s practical role, although a unit that shuts down unusually quickly also warrants inspection.
The benefit on the other side of this compromise is portability. Household power may be available where higher-voltage service is not. Larger 220V or dual-voltage equipment generally offers more working margin and productivity for thicker or sustained fabrication, but the Handler 135 remains more convenient in some locations.
Thickness is only one part of weld suitability
Nominal material thickness does not determine whether a joint will be sound. Fusion also depends on:
- Joint type, fit-up, and access
- Beveling and root conditions where applicable
- Base-metal cleanliness and coating removal
- Exact wire classification and diameter
- Polarity required by that wire
- Input power available under load
- Voltage and wire-feed settings
- Gun angle, stickout, travel speed, and manipulation
- Applicable procedure and inspection requirements
- Operator competence
Do not infer approval for frames, suspension components, tow points, roll cages, lifting equipment, pressure-retaining work, or other safety-critical joints from a capacity label. Suitability for such work depends on design, process, procedure, inspection, and operator qualification—not merely on whether the machine can strike an arc.
Flux-Core or Gas-Shielded MIG: Choosing and Changing the Setup
The Handler 135 supports self-shielded flux-core wire and gas-shielded solid wire. The better choice depends on the work location, desired cleanup, material, and exact consumable.
Self-shielded flux core
Self-shielded flux-core wire does not depend on an external gas cylinder or gas envelope. That makes it practical outdoors, where wind can interfere with gas shielding.
Flux core can also simplify the initial test of an incomplete used machine because it removes the cylinder, regulator, hose, and gas coverage from the immediate troubleshooting equation. It does not eliminate the need to verify the wire, polarity, tip, drive-roll setup, and feed condition.
Solid wire with shielding gas
Solid wire requires a suitable shielding-gas system. Indoors and away from drafts, it may reduce cleanup because it does not deposit flux slag. It does not guarantee a clean or spatter-free arc: gas selection, contamination, voltage, wire speed, stickout, and technique still matter.
Forum participants have reported using both C25—75% argon and 25% carbon dioxide—and straight CO2. Some preferred C25 for smoother behavior and less cleanup, while others considered straight CO2 economical and workable. These are individual reports, not official Handler 135 gas recommendations. The discussion documents the differing anecdotal experiences with C25 and straight CO2.
Before using secondhand gas equipment, have the intended gas supplier verify the cylinder and confirm that the regulator and connections are appropriate for that gas and process. Do not assume compatibility from appearance alone.
Process-change checklist
Cabinet access and feed-path changes should be treated as de-energized setup work. Welding involves electrical, fume, and ultraviolet hazards, so use appropriate PPE, ventilation, and site precautions. The site safety notice emphasizes those hazards and states that equipment manuals and site rules take precedence.
Then work through these categories:
- Identify the exact wire. Record its classification, brand, diameter, and whether it is solid or self-shielded flux core.
- Read the wire instructions. Use the polarity and operating guidance printed on the spool, packaging, or manufacturer documentation.
- Install the correct spool. Control the loose wire end so it does not unwind.
- Select the matching drive-roll groove. Confirm that the groove type and size suit the wire.
- Install the matching contact tip. A worn, contaminated, or incorrectly sized tip can disrupt feeding.
- Set only enough drive tension for reliable feeding. Excess tension can deform wire or conceal resistance elsewhere in the feed path.
- Change polarity only when required by the exact wire. Follow the Handler 135 manual rather than applying a universal solid-wire or flux-core rule.
- For solid wire, connect suitable shielding gas. Verify the regulator, hose, and gas delivery before welding.
- Test on clean scrap. Begin with documented settings for the exact consumable and material where available, then adjust one variable at a time.
A user-produced video demonstrates one Handler 135 being changed from .035-inch flux-core wire to .024-inch solid wire, including changes to the spool, feed groove, polarity, tip, and gas supply. The uploader identifies the demonstration as personal practice rather than professional or manufacturer instruction, so it should be treated only as an illustration of the categories involved. Watch the Handler 135 process-change demonstration on YouTube.
The available evidence does not establish a complete official wire table, a universal gas-flow setting, or one polarity rule covering every consumable. Do not copy settings from an unrelated Handler 140, Millermatic 135, or forum post and assume they apply.
How to Inspect a Used Hobart Handler 135 Before Buying
Tested condition matters more than original retail price, claimed operating hours, or a seller’s statement that the machine was “barely used.”
Use a staged inspection so appearance does not substitute for an operational test.
1. Confirm identity and power requirements
- Read the model and serial plate.
- Confirm that the machine is a Handler 135 rather than a Handler 140 or another 135-class welder.
- Record the input rating before arranging a test.
- Photograph the model plate and any identification on the installed gun.
- Check whether the input cord or plug has been altered.
A clean case or fresh paint is not model verification.
2. Inspect the exterior with power disconnected
Look for:
- Cracked panels or missing fasteners
- Impact damage, heavy corrosion, or signs of water entry
- Cuts, crushed areas, taped repairs, discoloration, or damaged prongs on the input cord
- Blocked vents or accumulated conductive debris
- Loose or inconsistent control movement
- Persistent burned-electrical odor
Refer uncertain electrical damage to a qualified repairer.
3. Inspect the gun and work circuit
Examine:
- Gun handle and trigger
- Cable jacket along its full length
- Machine-end gun connection
- Gun neck, nozzle, tip, and adapter
- Work lead and clamp
- Cable-to-clamp connection
Gently flex the disconnected gun cable while checking for cracks, hard bends, crushed areas, or makeshift repairs. Damage close to a connector deserves particular attention because the internal conductor may be affected even when the jacket appears repairable.
Unknown gun damage should reduce the offer by more than the visible price of a small part. Until the gun and connector are identified, the buyer does not know whether the repair requires a tip, liner, cable repair, or complete replacement assembly.
4. Inspect the feed compartment with power disconnected
Check:
- Wire condition and spool label
- Spool hub and brake condition
- Drive-roll wear, groove selection, and alignment
- Pressure arm and tension adjustment
- Inlet guide and liner entry
- Internal polarity arrangement
- Accessible connections for corrosion, looseness, heat discoloration, or melted insulation
This is a visual screening step, not an invitation to dismantle electrical assemblies. If the inspection reveals damaged terminals, melted insulation, or uncertain internal modifications, stop and seek qualified service.
5. Ask about the machine’s history
Useful questions include:
- Where was it stored?
- Was it exposed to water, condensation, or heavy grinding dust?
- Has it shut down or behaved intermittently?
- Has the gun, feed motor, selector, or control board been replaced?
- Why is the current gun installed?
- How old is the wire in the machine?
- When did it last make a successful weld?
- Can the seller demonstrate each included process?
Treat “worked when parked” as untested.
6. Conduct an operational test
Use suitable PPE, ventilation, fire precautions, clean noncritical scrap, and a known-correct consumable setup. Keep cabinet inspection and feed-path handling separate from energized testing.
Verify that:
- The trigger functions consistently.
- Wire feeds smoothly without surging, slipping, or bird-nesting.
- Moving the gun cable gently does not interrupt feeding or arc behavior.
- The gas valve operates when testing a gas-shielded setup.
- Gas reaches the gun without an obvious obstruction.
- Each voltage position produces a meaningful change in controlled test welds.
- The machine does not develop smoke, burning odor, abnormal connector heat, or immediate protective shutdown.
Follow the original manual for voltage-selector operation. Do not assume that the selector may be changed while an arc is active.
7. Make test welds that reveal behavior
Use clean scrap of known type and thickness, known-good wire, the correct polarity, and a clean clamp location. Assess:
- Arc starting and stability
- Consistent feeding
- Response to voltage and wire-speed changes
- Fusion at the toes and root
- Porosity and slag behavior
- Unusual thermal interruption
- Changes when the gun cable is repositioned
Do not judge the test only by the bead surface. On noncritical coupons, a bend, break, or sectioned test can reveal whether fusion developed as expected.
8. Value accessories separately
Inspect each accessory on its own merits:
- Helmet: Shell, headgear, lens operation, controls, and condition
- Regulator: Damage, intended gas, threads, gauges, and impact history
- Cylinder: Identification, condition, and whether a local supplier will accept it
- Cart: Stability, bottle restraint, wheels, and corrosion
- Consumables: Exact type, size, compatibility, age, and storage condition
- PPE: Fit, contamination, burns, and general condition
A premium helmet or complete cart-and-regulator package can improve the overall deal. It does not prove that the welder itself has a higher market value.
If the seller refuses a basic weld test, price the machine strictly as an unknown repair project—or walk away.
What Is a Used Handler 135 Worth Today?
The supplied evidence does not support a universal current price range. Forum prices from earlier decades are historical anecdotes shaped by their local markets, available products, warranties, and purchasing power. A 2010 discussion, for example, based its valuation on a specific machine with damaged gun wiring and unknown storage history rather than a general market survey. That used-pricing discussion illustrates why testing and repair exposure matter more than remembered original cost.
Original purchase price is a weak anchor. A discontinued electrical tool has used up its original warranty period, may have an unknown service history, and now competes with machines offering different controls, duty cycles, warranties, and voltage options.
Use a current valuation process instead.
Step 1: Find relevant comparisons
Look for:
- Recent completed Handler 135 sales where available
- Local working Handler 135 listings
- Comparable household-power wire welders in similar condition
- New entry-level and dual-voltage alternatives
- Confirmed prices for missing or damaged components
Completed sales are more useful than optimistic asking prices.
Step 2: Assign a condition tier
| Tier | Description | Valuation approach |
|---|---|---|
| Fully tested | Welds correctly, voltage positions respond, feed is stable, cables are sound, and gas operation works if tested | Strongest used value, but compare total cost with a new machine |
| Operational with needs | Welds correctly but needs normal service items or accessories | Deduct verified parts and reasonable service cost |
| Feed or gun fault | Trigger, liner, cable, connector, or feed is defective or intermittent | Deduct confirmed repair cost plus an uncertainty allowance |
| Suspected internal fault | Weak output, selector problems, repeated protection trips, or overheating connections | Treat as a repair project unless professionally diagnosed |
| Untested | Seller cannot or will not demonstrate welding | Value as unknown, not “probably fine” |
Step 3: Separate the welder from the package
Price the bare machine first. Then assign value only to accessories you have inspected:
- Helmet
- Cart
- Regulator and hose
- Cylinder
- Gun
- Wire
- Tips and nozzles
- Jacket, gloves, and other PPE
Old or unidentified wire may have little practical value. A regulator is not useful if its condition or intended gas is uncertain. A cylinder should not be counted at full value until a supplier confirms that it can be serviced or exchanged.
Step 4: Subtract uncertainty as well as parts
A confirmed liner replacement is a bounded repair. “It probably only needs a board” is not.
Account for:
- Diagnosis
- Technician labor
- Shipping
- Incorrect or incompatible parts
- Downtime
- The possibility that the first repair does not solve the fault
Step 5: Compare the complete decision
Compare the used package with a newer alternative on:
- Total cash outlay
- Warranty
- Duty cycle at a stated output
- Useful output
- Household-only or dual-voltage operation
- Replacement-gun support
- Major-parts support
- Local service availability
- Included equipment
- Likely repair exposure
A Handler 135 can be good value without being the cheapest listing. It can also be poor value at a low asking price if it is untested and parts compatibility is uncertain.
Replacement Guns, Consumables, and the Parts-Availability Risk
At the time represented by the supplied retailer evidence, HTP America/USA Weld displayed a Handler 135 collection containing a replacement gun and related components. The represented categories included:
- MIG gun
- Gas nozzles
- Contact tips
- Contact-tip adapter
- Swan neck
- Steel liner
- Teflon liner
- Trigger switch
A collection title does not prove that every listed item fits every Handler 135. Some product descriptions refer broadly to Miller M-series guns or only to certain Hobart guns. Inventory and prices can also change. The retailer’s Handler 135 collection shows the marketed categories but requires item-by-item fitment verification.
Before ordering:
- Record the complete welder model and serial number.
- Identify the brand and model of the installed gun.
- Photograph the machine-end connector, trigger wiring, neck, diffuser, and tip.
- Compare cable length, connector geometry, pin arrangement, and consumable family.
- Ask the seller for written confirmation of fitment.
- Confirm whether modification is required.
- Review the return policy before installation.
- Treat displayed prices as changeable, not as fixed repair estimates.
Ordinary gun consumables may remain obtainable, subject to verification. Major internal components are a different risk. The available evidence does not establish present supply or serial-number compatibility for control boards, transformers, selector assemblies, or feed motors.
That distinction should influence the purchase decision. A unit needing a verified tip, nozzle, liner, clamp, or replacement gun may have a predictable repair path. Weak output or an unresolved internal electrical fault carries substantially more uncertainty.
Troubleshooting Stuttering, Spatter, Porosity, and Weak Penetration
Owners have reported symptoms including stuttering, globbing, pulsing, heavy spatter, porosity, wire sticking, and lost penetration. Those symptoms overlap across many possible causes. The available forum cases raised setup, input power, consumables, gun damage, connections, and control-board faults, but did not establish one common Handler 135 defect.
Use a low-risk sequence and change one variable at a time.
Step 1: Verify process and consumables
Confirm:
- Solid wire with appropriate shielding gas, or self-shielded flux core as intended
- Exact wire classification and condition
- Wire diameter
- Polarity specified by the wire manufacturer
- Matching contact-tip size
- Correct drive-roll groove
- Reasonable drive tension
- Clean nozzle and diffuser
- Suitable starting settings for the consumable and material
Discard heavily rusted, contaminated, kinked, or unidentified wire. If the problem began after changing wire or converting processes, retrace every setup change before suspecting an internal fault.
Perform feed-path handling with input power disconnected.
Step 2: Eliminate obvious input-power problems
Use a supply appropriate to the welder’s documented requirements. Avoid questionable adapters and damaged, warm, coiled, long, or undersized extension cords. Because the supplied evidence does not include official Handler 135 branch-circuit or cord requirements, do not invent a conductor size or breaker recommendation.
A long extension cord can contribute to voltage drop, but it is not automatically the cause of a welding problem. In one reported case, removing the extension cords and changing several setup variables did not resolve weak, porous welds. That unresolved case shows why extension-cord length should be tested as a variable rather than treated as a diagnosis.
If supply performance is uncertain, have the circuit evaluated by a qualified person against the machine’s documented requirements. Do not alter wiring or overcurrent protection merely to prevent trips.
Step 3: Check the work-return path and external cables
With power disconnected, inspect:
- Clamp jaws and spring condition
- Cable-to-clamp connection
- Full work-lead length
- Gun cable and jacket
- Machine-end gun connector
- Accessible external connections
For the energized scrap test, attach the work clamp to clean, bare metal close to the test area. If you need more context on why this connection matters, see this practical overview of welding work-clamp inspection and return-path problems.
Stop testing if a connector develops unusual heat, discoloration, or intermittent behavior. If repositioning the gun cable changes the feed or arc, investigate the gun assembly rather than continuing to weld.
Step 4: Separate feed problems from gas problems
For wire feeding, with input power disconnected before handling the feed path:
- Confirm that the spool turns freely without overrunning.
- Verify that the wire enters the guide and drive groove correctly.
- Check for obvious resistance through the liner.
- Inspect the contact tip for wear or contamination.
- Check the liner for kinks, contamination, or size mismatch.
- Keep the gun cable reasonably straight during testing.
For gas-shielded welding:
- Confirm that the intended gas is connected.
- Have uncertain regulator or cylinder compatibility checked by the supplier.
- Verify that gas reaches the gun.
- Inspect the nozzle and diffuser for blockage.
- Test away from disruptive drafts.
Machine age alone does not establish a circuit-board fault.
Step 5: Compare behavior methodically
On clean scrap with known-good consumables:
- Establish a repeatable test joint and travel method.
- Test feed consistency before striking an arc.
- Make short test welds while changing one control at a time.
- Compare all four voltage positions under similar conditions.
- Record whether each position changes arc behavior meaningfully.
- Note whether the fault appears immediately or after heating.
- Repeat with the gun cable in a neutral position.
Follow the original manual when operating the selector; do not change it during an active arc unless the manual expressly permits that procedure.
Classify what you observe:
- Feed-related: Wire speed surges, slips, stalls, or changes with cable position.
- Gas-related: Porosity or oxidation changes with shielding conditions.
- Input-related: Symptoms correlate with a particular supply, adapter, cord, or concurrent load.
- Connection-related: Heat, discoloration, or intermittent behavior appears at a cable or connector.
- Machine-wide: Weak output or instability remains with a verified setup at every position.
A reported Handler 135 case involved stuttering and globbing at every setting. Participants proposed polarity, supply, feed components, connections, or a control-board issue, but the discussion documented no final diagnosis. The unresolved thread is useful as a symptom checklist, not proof of a specific Handler 135 defect.
Step 6: Escalate unresolved electrical faults
After correct setup, known-good consumables, suitable input power, clean clamp contact, and sound external cables have been verified, remaining possibilities may include a damaged gun conductor, loose internal power connection, worn selector component, feed-control fault, or control-board problem. These are possibilities, not remote diagnoses.
Do not use this article as a live internal electrical-testing procedure. Internal measurements and unresolved electrical repairs belong with a technician qualified to service welding equipment.
Stop using the machine and seek qualified assessment when you find:
- Persistently weak output at every setting
- Overheating connectors or terminals
- Damaged insulation
- Repeated protective shutdowns
- Smoke or burning odor
- Arcing inside the cabinet
- An intermittent fault that cannot be reproduced safely
- Abnormal heating in the input cord, gun cable, or work lead
Repair the Handler 135 or Replace It With a Newer Welder?
Begin by separating predictable service work from uncertain electrical repair.
Repairs that may be economically reasonable
If compatibility is confirmed, the following are usually more bounded than internal electrical faults:
- Contact tips
- Nozzles
- Tip adapter
- Liner
- Trigger or trigger switch
- Work-clamp cleaning or replacement
- Cable-end service by a competent repairer
- Compatible replacement gun
- Routine feed-path cleaning and adjustment
A modest service item may restore a useful light-duty welder. The essential requirements are a specific diagnosis and a confirmed part.
Repairs that justify a professional estimate
Seek a written estimate when a fault remains after:
- Correct process and polarity verification
- Testing with known-good wire and consumables
- Feed-path inspection
- Input-supply checks
- Work-clamp and external-cable inspection
- Controlled test welds across the voltage positions
The estimate should identify the suspected component, part availability, labor, repair warranty, and whether additional faults could change the total.
Favor repair when
Repair is most defensible when:
- The machine is otherwise clean and sound.
- The fault has been identified rather than guessed.
- A compatible part is confirmed.
- The repair includes some service assurance.
- The completed machine still suits the intended light-duty work.
- Total cost remains attractive compared with a newer alternative.
Favor replacement when
Replacement becomes more sensible when:
- Several systems are faulty.
- The gun, feed system, and output all need work.
- Major insulation or internal components are damaged.
- The required part is unavailable or has uncertain fitment.
- A board problem is suspected but unconfirmed.
- The estimate approaches the cost of a more capable warranted machine.
- Downtime matters.
- The work already exceeds the Handler 135’s comfortable role.
Compare total repair cost with a newer welder’s purchase price, warranty, parts support, stated duty cycle, output, controls, and voltage flexibility. There is no universal dollar threshold because labor rates, inventory, promotions, and local used prices vary.
If the real workload includes thick stock, frequent fabrication, long welds, or repeated thermal interruptions, repairing around the Handler 135’s basic limitations is unlikely to be the best long-term decision. A 220V or dual-voltage welder is the more logical direction.
Frequently Asked Questions
How thick can a Hobart Handler 135 weld?
Northern Tool’s archived listing publishes a 22-gauge-through-3/16-inch single-pass range. Treat the upper figure as a retailer-listed ceiling, not a guarantee of adequate fusion in every joint, setup, or operating condition. The archived product page provides the published thickness range.
Joint preparation, wire, polarity, input power, settings, technique, and procedure requirements still determine whether the result is acceptable.
Does the Hobart Handler 135 run on household power?
Yes. The archived retailer listing identifies it as a household-power machine, which is one of its principal practical advantages.
That does not mean every outlet, adapter, extension cord, or branch circuit is suitable. Use the original machine documentation and applicable electrical requirements when arranging the supply.
Can the Handler 135 use both flux-core and solid MIG wire?
Yes. The archived listing describes operation with shielding gas or self-shielded flux-core wire.
Changing processes may require a different wire spool, drive-roll groove, contact tip, polarity arrangement, and gas setup. Follow the exact wire instructions and applicable Handler 135 manual rather than applying a universal polarity rule.
What is a fair price for a used Hobart Handler 135?
There is no reliable universal price in the available evidence. Find recent completed sales where possible, compare local working machines, assign a condition tier, and deduct documented repair costs plus uncertainty.
Value the welder separately from the helmet, cart, regulator, cylinder, wire, and PPE. Then compare the total package with a newer machine’s warranty, duty cycle, parts support, output, and voltage flexibility.
Are replacement guns and parts still available for the Handler 135?
A third-party retailer has displayed a Handler 135 collection containing replacement guns, nozzles, tips, an adapter, necks, liners, and a trigger switch. That does not confirm present stock or exact compatibility with every machine.
Record the welder model and serial number, identify the installed gun, compare connectors and cable details, request written fitment confirmation, and review the return policy before ordering. The available evidence does not establish current availability for control boards or other major internal components.
Final verdict: A fully tested Handler 135 can still earn its place as a simple light-duty welder when household-power portability matters. Its age and discontinued status shift the decision away from reputation and toward evidence: stable test welds, sound cables and feed components, verified process operation, confirmed parts fitment, and a price that leaves room for repair risk.
If your projects routinely approach the machine’s published limit, require long welds, or cause repeated thermal interruptions, put the money toward a newer, higher-duty-cycle dual-voltage welder instead.